| A stand allows you to place your Nest thermostat on a shelf, table or desk, instead of mounting it on the wall. The stands are different for Nest Learning Thermostats and the Nest Thermostat E, so select your thermostat below for relevant instructions and tips. |
 |
Nest Learning Thermostat
How to purchase the Nest Stand, power cable and adapter
Important: The stand is different for the 2nd and 3rd gen Nest Learning Thermostats, and they are not interchangeable. To make sure you get the right stand for your thermostat, see the differences below.
How to tell which Nest thermostat you have >

- 3rd and 2nd gen Nest Learning Thermostats don’t come with a stand. You can purchase the Nest Stand, power adapter and cable from the Google store.
-
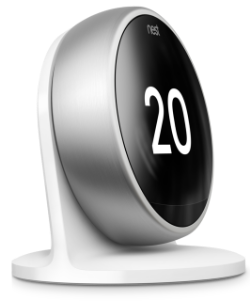
The Nest Thermostat E comes with an integrated stand that’s included in the box with the thermostat. There is no need to purchase anything additional for installation.
Replacing a stand, cable or power adapter
- If you’ve misplaced or damaged the power adapter, you can use a USB charger for mobile phones or tablets that’s rated to deliver at least 5 VDC @ 5 Watts.
- If you need to replace the power cable, you can use a standard micro USB cable for 3rd or 2nd gen Nest Learning Thermostats.
- If your thermostat is still covered under warranty, you can contact our support team to see if a replacement is possible.
Note: Nest cannot guarantee that third party accessories will work with your Nest products.
Where to place your thermostat
It’s important to place your stand-mounted Nest thermostat within wireless range of the Heat Link (30m maximum distance), and away from drafts or heat sources (fireplaces, heaters etc.) so it can get an accurate temperature reading.
For complete details about where to place your thermostat, please see Where to place your Nest thermostat.
How to mount your Nest Learning Thermostat on the stand

1. Thread the power cable that came with your Nest Stand through the hole so that the small end of the cable comes out in the front.
2. Plug the small end of the USB cable into the thermostat base.
3. Press the base onto the stand until it snaps into place. Then secure it with the provided screws.
4. Press the thermostat display onto the base. The Nest logo facing up. You should hear it click into place.
5. Connect the large end of the USB cable to the plug, and plug it into a wall socket. Your thermostat should turn on.
Only move your thermostat if necessary
Your Nest thermostat gets used to the temperature and level of activity in one spot, so if you move it to a new spot or to another room it may not work as you expect. Moving your thermostat closer to the edge of a table is fine, but moving the stand across the room or to another room can confuse your thermostat.
But you may need to move your thermostat if you’ve rearranged your furniture, if it has trouble communicating with the Heat Link, or has problems connecting to your home Wi-Fi network.
If you move your thermostat
- Make sure it's new location meets the criteria for where to install the Nest Stand.
- Update the location name with the Nest app, so it’s easier for you and others to keep track of.
- If your thermostat’s Wi-Fi or Heat Link connection isn’t strong enough in the new location, you’ll see an error message on your thermostat and in the app. Try moving your thermostat a bit closer to the Heat Link (30m maximum distance) or your Wi-Fi router. Also, check for wireless interference.
Nest Thermostat E
Where to place your thermostat
It’s important to place your stand-mounted Nest thermostat within wireless range of the Heat Link (30 m maximum distance), and away from drafts or heat sources (fireplaces, heaters etc.) so it can get an accurate temperature reading.
For complete details about where to place your thermostat, please see Where to place your Nest thermostat.
Only move your thermostat if necessary
Your Nest thermostat gets used to the temperature and level of activity in one spot, so if you move it to a new spot or to another room it may not work as you expect. Moving your thermostat closer to the edge of a table is fine, but moving the stand across the room or to another room can confuse your thermostat.
But you may need to move your thermostat if you’ve rearranged your furniture, if it has trouble communicating with the Heat Link, or has problems connecting to your home Wi-Fi network.
If you move your thermostat
- Make sure its new location meets the criteria for where to install the Nest Stand.
- Update the location name with the Nest app, so it’s easier for you and others to keep track of.
- If your thermostat’s Wi-Fi or Heat Link connection isn’t strong enough in the new location, you’ll see an error message on your thermostat and in the app. Try moving your thermostat a bit closer to the Heat Link (30m maximum distance) or your Wi-Fi router. Also, check for wireless interference.
Replacing a stand or cable
Note: Nest cannot guarantee that third party accessories will work with your Nest products.
- The Nest Thermostat E’s stand has an integrated power cable so it can’t be replaced separately, If you’ve misplaced or damaged the power adapter, you can use a USB charger for mobile phones or tablets that’s rated to deliver at least 5 VDC @ 5 Watts.
- If your thermostat is still covered under warranty, you can contact our support team to see if a replacement is possible.